Difference between revisions of "POP Kiosk Cover (part)"
| Line 2: | Line 2: | ||
==Overview== | ==Overview== | ||
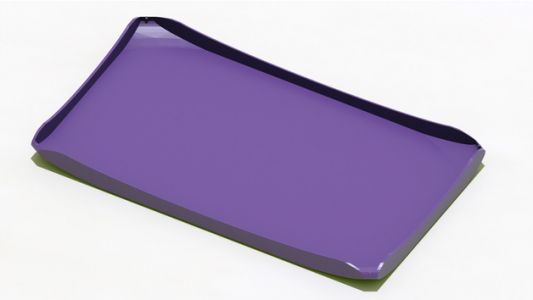
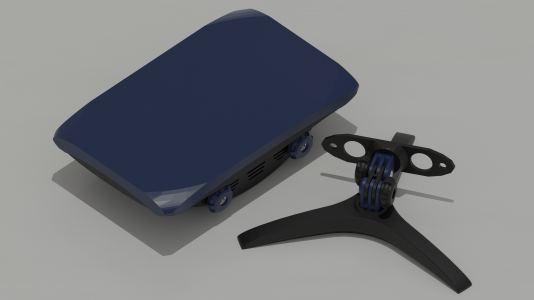
The cover provides protection to the front of the kiosk display by attaching directly to the [[POP Kiosk Collar (part)|collar]] or [[POP Kiosk Bumper (part)|bumper]]. This cover was created to provide protection to the glass screen during transport and storage. | <gallery mode="packed" heights="200"> | ||
File:Cover.jpg|alt=Cover | |||
File:POP Kiosk Disassembled.png|alt=Cover on Kiosk | |||
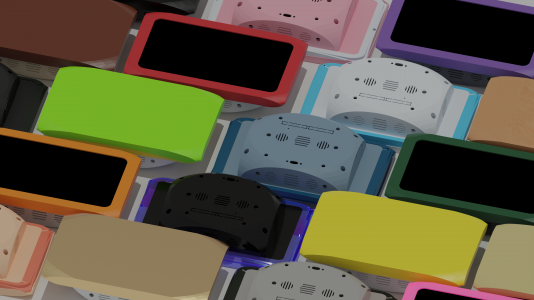
File:POP Kiosk Color Options.png|alt=Mix and Match Colors | |||
</gallery>The cover provides protection to the front of the kiosk display by attaching directly to the [[POP Kiosk Collar (part)|collar]] or [[POP Kiosk Bumper (part)|bumper]]. This cover was created to provide protection to the glass screen during transport and storage. | |||
==Features== | ==Features== | ||
*Provides protection to the touchscreen display during transport | *Provides protection to the touchscreen display during transport | ||
Revision as of 17:38, 2 March 2023
Overview
The cover provides protection to the front of the kiosk display by attaching directly to the collar or bumper. This cover was created to provide protection to the glass screen during transport and storage.
Features
- Provides protection to the touchscreen display during transport
- Rounded and tapered corners designed to reduce accidental snags
- Optional foam pad adds extra impact protection
Specifications
Dimensions
This kiosk bumper is 213.45mm x 127.56mm x 13.00mm.
Printed Parts
| Part | Description | Quantity | Estimates | Example | |
|---|---|---|---|---|---|
| Print Time | Filament Usage | ||||
| Cover | A protective touchscreen cover | 1 | 6 hours 26 minutes | 42g | |
Hardware
This part requires no additional hardware.
Material
This part is printed with polylactic acid (PLA) or other sturdy plastic, such as Polypropylene (PP) or Acrylonitrile styrene acrylate (ASA).
Printing This Part
Slicing
Orientation
| Part | Notes | Example |
|---|---|---|
| Cover | We recommend printing the cover with the front in contact with the build plate. |
Settings
Cover
We start with the default "Standard Quality" 0.2 mm print profile. We recommend the following settings overrides:
| Setting | Recommendation | Notes |
|---|---|---|
| Shell - Wall Line Count | 3 | This will print all of the walls as solid. |
| Shell - Bottom Layers | 5 | This will print the entire protective front as a solid piece of plastic without infill. |
| Infill - Density | 10% | This part does not apply much as the cover is thin and does not need infill. |
| Infill - Pattern | Tri-Hexagon | These infill patterns provide good internal support in multiple directions. Tri-Hexagon uses less filament but is also less durable. |
| Speed - Print Speed | 40mm/s | For final production prints, we recommend printing slower than average to improve print quality with the thin walls. |
| Support - Generate Support | No | This part has no overhangs. |
| Build Plate Adhesion - Adhesion Type | None | This part has a lot of contact with the print bed and should not require a raft. |
Results
Printers
This part has been print tested with the following 3D printers:
| Manufacturer | Model | Notes |
|---|---|---|
| Creality | CR-10 Mini | Excellent print quality. Reliable machine. |
| Creality | CR-10 | Excellent print quality. Reliable machine. |
| Creality | Ender 3 S-1 Pro | Excellent print quality. Reliable machine. |
Build Surface
This part has been print tested with the following build surfaces:
| Method | Notes |
|---|---|
| Painter's tape | |
| Glue stick | Creates an uneven and non-uniform first print layer appearance. |
| Adhesive build surface | First layer may have problems printing full height depending on type and hardness of build surface, but this does not affect the overall printability. |
| Polyetherimide (PEI) build plate | There were no issues with print plate adhesion. |
Filament
This part has been print tested with the following materials:
| Filament | Manufacturer | Notes |
|---|---|---|
| Overture PLA | Overture | Excellent build quality and durability. Good for prototyping or production kiosks. |
| Amazon Basics PLA | Amazon | Decent build quality and durability. Recommended for rapid prototyping. |
| Documentation | |
|---|---|
| Installation | Look and Feel |
| Interaction Modes | Developing Activity Types |
| Creating an Interactive | Framework |
| Integrating CLIO | Contribute |


