Difference between revisions of "CLIO Installation"
| (8 intermediate revisions by the same user not shown) | |||
| Line 1: | Line 1: | ||
{{DocumentationPage}} | |||
== Overview == | == Overview == | ||
CLIO is a web-based application, which means that it needs to be installed on a web server. There is no setup process for databases, meaning that the application files can be dragged directly to the applicable web server folder and accessed without installation. Different Operating Systems have different locations for their hosted content. | CLIO is a web-based application, which means that it needs to be installed on a web server. There is no setup process for databases, meaning that the application files can be dragged directly to the applicable web server folder and accessed without installation. Different Operating Systems have different locations for their hosted content. | ||
== Creating a Local Development Environment == | == Creating a Local Development Environment == | ||
CLIO is a web-based application, which means that it needs to be developed on your local machine using a Local Web Development Environment (LWDE). If you are installing CLIO on a remotely hosted web server, you can ignore this section. If you are looking to test out CLIO on your local machine, though, you should follow this guide. | CLIO is a web-based application, which means that it needs to be developed on your local machine using a Local Web Development Environment (LWDE). If you are installing CLIO on a remotely hosted web server, you can ignore this section. If you are looking to test out CLIO on your local machine, though, you should follow this guide. We also provide a convenience script for Debian-based systems that will automatically install CLIO and all required software. | ||
{{See|Creating a Local Web Development Environment}} | {{See|Creating a Local Web Development Environment}} | ||
| Line 38: | Line 40: | ||
===Linux=== | ===Linux=== | ||
{{ | We offer a convenience script that can be used with Debian and most Debian-based distributions, such as Ubuntu, Kali and Linux Mint. This script can be used to install the Apache2 http web server, PHP7.4 modules, git, the Chromium web browser and the CLIO web app. | ||
==Accessing CLIO== | |||
Once CLIO has been installed on your web server, you can access it through your web browser. For local web development, you can navigate to http://localhost/ or http://127.0.0.1/.{{Note|You may need to open the XAMPP | {{Script Template|Download URL=https://cliomuseums.org/clio/install_scripts/debian/clio-install.sh}} | ||
Once the script is downloaded, we need to make it executable. This can be done through the Debian Graphical User Interface by right clicking on the <code>'clio-install.sh'</code> script file downloaded above and selecting <code>'Properties'</code>. Once there, we need to go to the Permissions tab and make sure that <code>'Allow executing file as a program'</code> is enabled. | |||
[[File:Debian CLIO Install Script permissions.png|frameless|500x500px]] | |||
Now, we can execute the script through the Terminal (also known as the command-line, console or shell), which is used to execute commands within the Debian operating system. The Terminal can be opened by pressing Control+Alt+T on your keyboard, or finding it within the Menu. | |||
[[File:Debian Terminal Screen.png|frameless|500x500px]] | |||
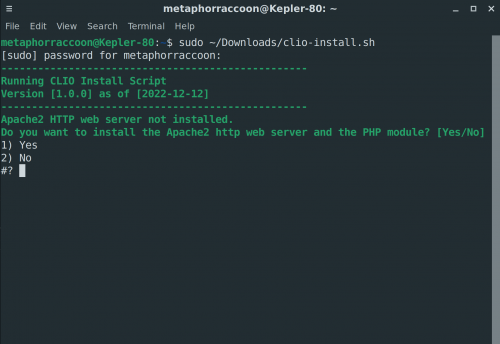
Once the Terminal is opened, we will start by typing <code>sudo</code> before our command. This will execute the following command as a superuser that provides the permissions necessary to install most software. If the script was placed into your Downloads folder, you can run the command <code>sudo ~/Downloads/clio-install.sh</code> in the Terminal window. Alternatively, you can type <code>sudo</code> and drag the script file to the Terminal window, which will be translated into a full path. | |||
Once you press enter, the script will execute and will be asked for your password. When you enter the characters for your password, there will be nothing to signify that you've typed characters. After entering your password, hit enter. The script will execute and walk you through the installation. Enter your desired option and press enter to proceed. | |||
[[File:CLIO Debian Install Script.png|frameless|500x500px]] | |||
==Accessing CLIO Exhibit== | |||
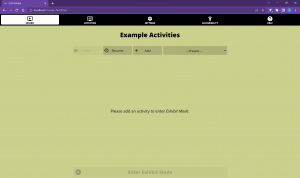
Once CLIO has been installed on your web server, you can access it through your web browser. For local web development, you can navigate to http://localhost/ or [http://127.0.0.1/ http://127.0.0.1/.][[File:CLIO in Web Browser.png|none|thumb|CLIO in Web Browser]]{{Note|You may need to open the XAMPP Control Panel and start the Apache web server, like [[Creating_a_Local_Web_Development_Environment|shown here]].}} | |||
== Updating CLIO Exhibit Content == | |||
CLIO Exhibit can be updated by changing files in the web server directory. This can be on a locally hosted web server, like a kiosk, or a publicly accessible web server, like your website. {{See|Updating CLIO Exhibit Content}}{{DocumentationNavigation}} | |||
Latest revision as of 17:13, 10 March 2023
Overview
CLIO is a web-based application, which means that it needs to be installed on a web server. There is no setup process for databases, meaning that the application files can be dragged directly to the applicable web server folder and accessed without installation. Different Operating Systems have different locations for their hosted content.
Creating a Local Development Environment
CLIO is a web-based application, which means that it needs to be developed on your local machine using a Local Web Development Environment (LWDE). If you are installing CLIO on a remotely hosted web server, you can ignore this section. If you are looking to test out CLIO on your local machine, though, you should follow this guide. We also provide a convenience script for Debian-based systems that will automatically install CLIO and all required software.
Download
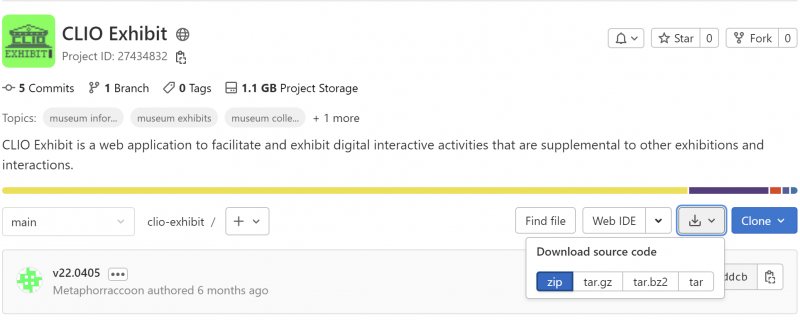
First, we need to download the CLIO web application package which is available on our GitLab. Click on the 'Download' button, which is beside the blue 'Clone' button. We recommend downloading the project in the .zip format because it has the best cross-platform compatibility.
Installation
Windows
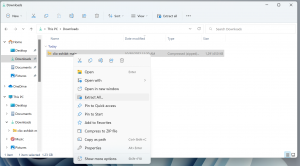
You can right-click on the “clio-exhibit-main.zip” file and select “Extract All”. Follow the prompts, choosing to open the folder when extraction is complete.
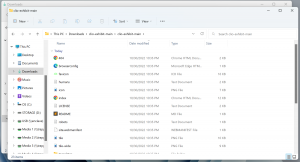
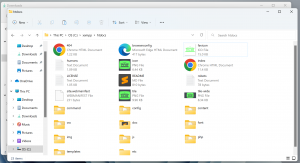
Once you have extracted the ZIP file, navigate into the "clio-exhibit-main" folder within the new Explorer window.
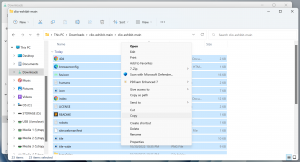
Next, select everything in the folder and "copy” it using the right-click context menu or CTRL-C.
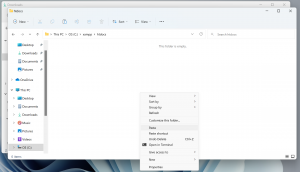
Now we need to navigate to the Web Server host directory. If you follow the Creating a Local Web Development Environment guide, the default location is “C:\xampp\htdocs”. If there are any files or folders (such as index.html or a dashboard folder), you can safely delete them so that the folder is empty.
Once you’re in this folder, you can "paste" the contents here using the right-click context menu or CTRL-V.
MacOS
You can right-click on the “clio-exhibit-main.zip” file and select “Open”. MacOS will extract the archive into the same folder as the zip file.
After extracting the zip file, open the “clio-exhibit-main” folder. Next, select everything in the folder and "copy” it using the right-click context menu or CMD-C.
Now, we need to navigate to the Web Server host directory. Open XAMPP. We will need to go to the “Volumes” tab. This will allow us to mount file system used by the web server as an accessible drive, so we can make changes to the files that are being hosted.
Click “Mount” beside the first data volume, which should be “/opt/lampp”. This will make the volume appear in Finder so we can alter files.
The web server’s contents are stored in this new mounted volume, in the htdocs folder.
Once you're in this folder, you can "paste" the contents here using the right-click context menu or CMD-V.
Linux
We offer a convenience script that can be used with Debian and most Debian-based distributions, such as Ubuntu, Kali and Linux Mint. This script can be used to install the Apache2 http web server, PHP7.4 modules, git, the Chromium web browser and the CLIO web app.
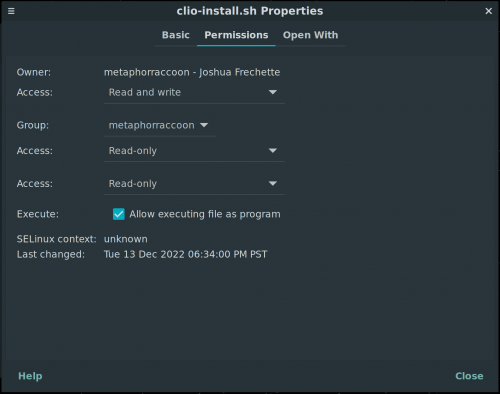
Once the script is downloaded, we need to make it executable. This can be done through the Debian Graphical User Interface by right clicking on the 'clio-install.sh' script file downloaded above and selecting 'Properties'. Once there, we need to go to the Permissions tab and make sure that 'Allow executing file as a program' is enabled.
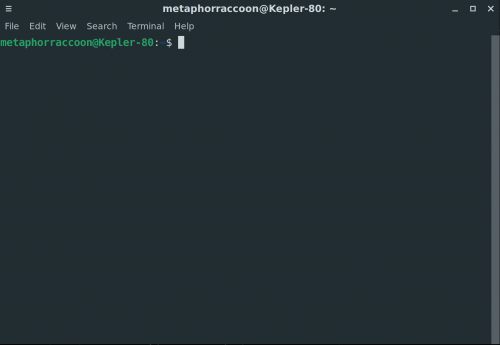
Now, we can execute the script through the Terminal (also known as the command-line, console or shell), which is used to execute commands within the Debian operating system. The Terminal can be opened by pressing Control+Alt+T on your keyboard, or finding it within the Menu.
Once the Terminal is opened, we will start by typing sudo before our command. This will execute the following command as a superuser that provides the permissions necessary to install most software. If the script was placed into your Downloads folder, you can run the command sudo ~/Downloads/clio-install.sh in the Terminal window. Alternatively, you can type sudo and drag the script file to the Terminal window, which will be translated into a full path.
Once you press enter, the script will execute and will be asked for your password. When you enter the characters for your password, there will be nothing to signify that you've typed characters. After entering your password, hit enter. The script will execute and walk you through the installation. Enter your desired option and press enter to proceed.
Accessing CLIO Exhibit
Once CLIO has been installed on your web server, you can access it through your web browser. For local web development, you can navigate to http://localhost/ or http://127.0.0.1/.
Updating CLIO Exhibit Content
CLIO Exhibit can be updated by changing files in the web server directory. This can be on a locally hosted web server, like a kiosk, or a publicly accessible web server, like your website.
| Documentation | |
|---|---|
| Installation | Look and Feel |
| Interaction Modes | Developing Activity Types |
| Creating an Interactive | Framework |
| Integrating CLIO | Contribute |
