Difference between revisions of "Creating a Local Web Development Environment"
(→Linux) |
|||
| (One intermediate revision by the same user not shown) | |||
| Line 1: | Line 1: | ||
{{DocumentationPage}} | |||
== Overview == | == Overview == | ||
CLIO is a web-based application, which means that it needs to be developed on your local machine using a web development environment. Many forms of code development happen in an Integrated Development Environment (IDE) designed to work with a specific coding language, but web development takes a slightly different approach. | CLIO is a web-based application, which means that it needs to be developed on your local machine using a web development environment. Many forms of code development happen in an Integrated Development Environment (IDE) designed to work with a specific coding language, but web development takes a slightly different approach. | ||
| Line 63: | Line 65: | ||
In order to access your newly installed web server’s content, you will need to go back to the “General” tab and click “Go to Application” to open your web server’s index file in your preferred browser. | In order to access your newly installed web server’s content, you will need to go back to the “General” tab and click “Go to Application” to open your web server’s index file in your preferred browser. | ||
==Linux== | ==Linux== | ||
{{ | We offer a convenience script that can be used with Debian and most Debian-based distributions, such as Ubuntu, Kali and Linux Mint. This script can be used to install the Apache2 http web server, PHP7.4 modules, git, the Chromium web browser and the CLIO web app automatically. | ||
{{See|CLIO Installation#Linux}}{{DocumentationNavigation}} | |||
Latest revision as of 15:25, 14 December 2022
Overview
CLIO is a web-based application, which means that it needs to be developed on your local machine using a web development environment. Many forms of code development happen in an Integrated Development Environment (IDE) designed to work with a specific coding language, but web development takes a slightly different approach.
For web development, we instead use a Local Web Development Environment (LWDE). These perform very similarly to an on-line web server, like the ones the power the World Wide Web. The difference is that this web server is constrained to your local computer and – if configured properly – your local network, meaning that only you and those given access can view or edit content on your Local Web Development Environment.
There are many free and open-source Local Web Development Environments available, which combine all of the required software and configurations required to quickly create a local web server with all of the required tools. Depending on the Operating System in use, there are collections of tools that achieve the same end goal through slightly different means of installation, toolkits or access methods. Many Local Web Development Environment (LWDE) are available on multiple platforms, such as Microsoft Windows, Apple MacOS and many Linux or Linux-like Operating Systems.
Windows
The XAMPP (Cross-Platform Apache, MariaDB, PHP, and Perl) LWDE is available for download here. Once downloaded, the installer application can be run by double-clicking on the icon, or right clicking on it and selecting ‘Open’. Be aware that installing this software requires administrative rights and may need permission by an IT administrator.
Depending on your computer configurations, you may receive a notification about User Account Control, which is a Microsoft Windows security feature. This warning recommends that the software be installed somewhere other than the Program Files folder. Acknowledge the warning by clicking “OK”.
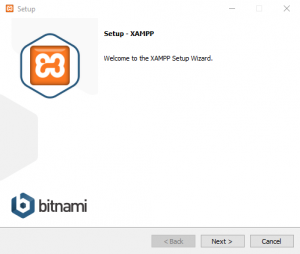
Click “Next >” to proceed through the installation process.
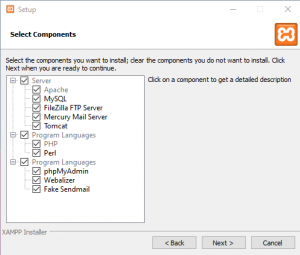
In most cases, installing the default options will provide full access to the CLIO web application. The only components required by CLIO are Apache and PHP, which cannot be disabled in the installer. Click “Next >” to proceed through the installation process.
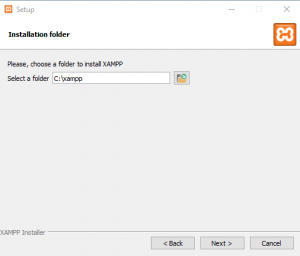
Here, we are asked to select the location where XAMPP will be installed. As noted by the warning at the start of the installation process, the default location for installation is at the root of the C: drive, in a folder called xampp. It is not recommended that this location be changed unless User Account Control has been completely disabled. Click “Next >” to proceed through the installation process.
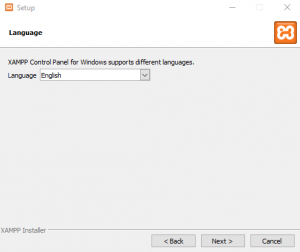
Choose your preferred language and click “Next >” to process through the installation process.
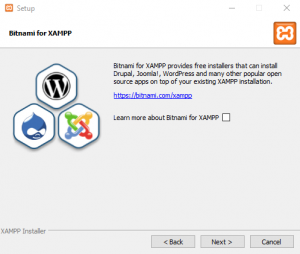
Bitnami is a tool that provides quick and easy installation of popular open-source applications used in web development. For the purposes of this project, you can untick the option to learn more. Click “Next >” to proceed through the installation process.
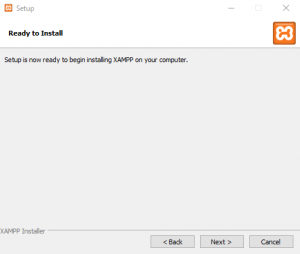
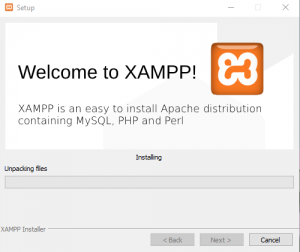
Click “Next >” one final time to begin the installation of the XAMPP Local Web Development Environment.
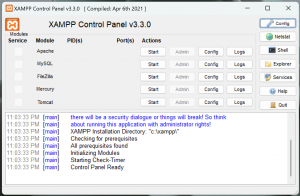
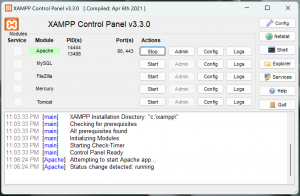
Now that XAMPP is installed, you can open the program to turn on the web server components.
From here, we can click "Start" beside the Apache module. This will cause the web server to start only on command. When Apache is started successfully, it will turn green.
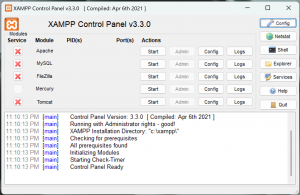
Alternatively, you can choose to install Apache as a service. This means that the web server will start each time you turn on your computer, so you don't need to complete this step each time you want to access the web server through your web browser. To do this, you must first open XAMPP as an Administrator by right-clicking on the icon and choosing 'Run as Administrator'.
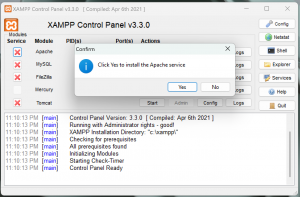
Now, to install Apache as a service, we can click on the red X beside Apache indicating the service is not installed.
Click 'Yes' to install Apache as a service and the icon should change to a green checkmark. The Apache web server will not start each time you boot your computer, allowing you to always access your local website in your web browser.
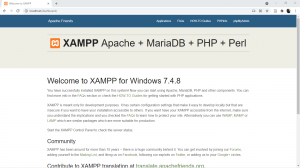
You can access your new web server by opening your browser of choice, such as Google Chrome or Mozilla Firefox, and entering the web URL: http://localhost/
MacOS
The XAMPP (Cross-Platform Apache, MariaDB, PHP, and Perl) LWDE is available for MacOS here. We recommend using version 7.4.21, but any version should work. The MacOS version of XAMPP comes in two different flavors: the installer (which runs in the background at all times) and the virtual machine (which only runs on command). For development purposes, the ‘vm’ version works well as it can be closed completely when not needed.
Click on “xampp-osx-7.4.21-0-vm.dmg” to download it. Once it is downloaded, navigate to the folder containing it.
Double-clicking on the icon, or right clicking and selecting “Open”, will mount this volume so that it can be installed. Once opened, MacOS will begin to verify the integrity of the file to ensure the data isn’t corrupted. Once the file is verified, Finder should automatically open the volume.
From here, we only need to drag the XAMPP executable to the Application folder alias to install it.
Once the application is copied to your Applications folder, we’ll need to navigate there to run the application. You can also use Launchpad or Search for XAMPP, if preferred. Opening the application for the first time will result in MacOS warning you that it was downloaded from the internet. Click ‘Open’.
Next, the XAMPP application will warn you that it needs to finish initializing its components, which will require Administrative privileges. Be aware that installing this software requires administrative rights and may need permission by an IT administrator. Click ‘OK’.
Enter your password and hit ‘OK’. This will finally open the main screen of the XAMPP application for MacOS.
In order to access the web server on your Mac computer, we will need to start some services. This can be done by selecting “Start” on the main screen.
After you select “Start”, the red icon will turn orange while the services initialize. If everything starts without error, the icon will turn green and the IP address field will be populated.
Next, we need to go to the “Services” tab and select “Start All”. The three red icons will turn orange while the services initialize. If everything starts without error, the icons will turn green.
Finally, we will need to go to the “Volumes” tab. This will allow us to mount the files used by the web server as a remote drive so we can make changes to the files that are being hosted.
Click “Mount” beside the first data volume, which should be “/opt/lampp”. This will make the volume appear in Finder so we can alter files.
The web server’s contents are stored in /lampp/htdocs/.
In order to access your newly installed web server’s content, you will need to go back to the “General” tab and click “Go to Application” to open your web server’s index file in your preferred browser.
Linux
We offer a convenience script that can be used with Debian and most Debian-based distributions, such as Ubuntu, Kali and Linux Mint. This script can be used to install the Apache2 http web server, PHP7.4 modules, git, the Chromium web browser and the CLIO web app automatically.
| Documentation | |
|---|---|
| Installation | Look and Feel |
| Interaction Modes | Developing Activity Types |
| Creating an Interactive | Framework |
| Integrating CLIO | Contribute |
