BurkeMobile Interactive Proposal
Overview
This toolkit can be used to create interactive exhibits for museums, libraries and other outreach and educational programs. Each interactive is built using low-cost hardware and open-source, open-license technology, such as Raspberry Pi computers and Debian linux.
Thanks to the small footprint of the electronic components, the physical design of the interactive can take many forms. In this application, the interactive was constructed as a 3D-printed touchscreen kiosk for the Burke Museum of Natural History and Culture BurkeMobile educational program; a mobile mini-museum pop-up experience.
This project utilizes ideas made available to the public by the Eastwick Oral History Project at the University of Pennsylvania. Their designs also use low-cost hardware and open-source technologies to create an interactive kiosk that plays audio files when a visitor places an RFID-embedded object on it.
Goals
Developing an interactive exhibit around Hanford nuclear development site and its lasting ecological impact is a fascinating challenge. The Burke Museum's integration of material surrounding Hanford and nuclear development into its new exhibits provides a unique opportunity to explore new avenues of engaging its audience, while simultaneously exploring the local cultural history of Washington state.
The voices of the people of Hanford, and other related nuclear-affected people worldwide, have been consistently silenced by "official" narratives that fail to provide a picture of the real human cost of nuclear weapons development and testing. In order to amplify these historically silenced voices, we propose that the Burke initiate an oral history project, along with an accompanying exhibit kiosk that will allow the people affected by the Hanford nuclear development site to tell their stories.
The accessibility of this project has been a leading priority from its inception. The interactive was created around the idea that there are multiple external senses, and in order to reach the largest audience, as many of these senses need to be engaged as possible. This allows the content to be accessible for those with visual and hearing impairments or disabilities.
By utilizing low-cost and open-source technology, in conjunction with existing Burke resources, we will collect stories and allow the people affected by Hanford to share their stories with the public, not only in their own words, but with their own voices.
This project will seek to meet three goals:
- Educate the public on Hanford related issues by amplifying the voices of those affected by the Hanford story through the construction of an oral history kiosk.
- Create a modular toolkit for interactive exhibits that is made freely available online.
- Further the ethical best practice of the Burke
Toolkit
This toolkit includes:
- Hardware
- Descriptions: Hardware has been detailed;
- Testing: Hardware has been shown to work in this application;
- Case: Hardware is encased in a mobile 3D-printed case.
- Software
- Operating System: flashable image for a Raspberry Pi computer;
- Configuration: scripting, alterations and settings;
- Software: local web server, kiosk-mode chromium, and other software;
- Interface
- Coding: HTML, CSS; content is loaded through JavaScript;
- Content: All customization is stored in the content directory using JSON.
- Documentation: Source code is fully annotated, including a manual.
Hardware
This interactive utilizes a Raspberry Pi single-board computer, a Raspberry Pi 7” touchscreen, near-field communication and 3D-printing. With the materials for each interactive costing less than $250, this allows for multiple exhibits to be linked together into Programs and Sections. This project aims to provide an inexpensive way to create a truly unique addition to exhibits or educational programs.
The interactive can be constructed without any soldering, which allows it to be easily repaired. A case, screen bumper and stand have been provided that can be printed with most 3D-printers using easily available materials, such as bio-degrable PLA or TPU. Overall, only four screws are required to construct the interactive.
Software
All the software and libraries used in this project are open-source, and generally released under the MIT or GPLv3 license, allowing the software to be used and re-distributed with acknowledgements.
The Raspberry Pi Foundation actively maintains an open-source distribution of Linux known as Raspbian, with integrated Linux security updates. It is based on the widely-supported Debian Linux operating system. For this project, a build of Raspbian called DietPi was used for its noticeable speed improvements on older Raspberry Pi systems.
Raspbian has access to an array of Linux programs that are actively curated by the Raspberry Pi Foundation, as well as by an active community of Linux and Raspberry Pi users and developers. This distribution has undergone intense testing by the manufacturer and community. Raspberry Pi’s are exceptionally stable, especially in black-box applications.
Interface
The Raspberry Pi computer will run a local Apache2 web server that hosts a small web application. It starts up into a full-screen Chromium web browser that cannot be closed and loads the web application that is being hosted by the local web server.
This web application acts as the only interface and handles all user interaction. It was created with large on-screen buttons, elements and scrollbars in a way that is meant to feel more responsive than traditional kiosks.
Getting Started
Access to the Raspberry Pi desktop is available by connecting a keyboard. Once the tablet boots up, hit Alt-F4. This will bring up a Clio logo. Hitting Alt-F4 again will display display the command-line prompt for logging in.
Login: root
Password: CLIO
When entering your password, it is normal for the console not to type characters in response to your keypresses.
After logging in, you will be shown another console. From here, you can type startx to start the desktop window manager. You can also type reboot to reboot the system into the browser.
Requirements
Hardware
The scope, requirements or capabilities of the hardware varies depending on the requirements of the application. This project primarily consists of a dedicated web application that runs in a web browser with no access to the underlying operating system. This simplicity allows a variety of hardware to be used, ranging from Raspberry Pi computers (and other single-board computers) to traditional desktops.
This project was primarily designed to be used with a touchscreen, specifically the Raspberry Pi official seven-inch touchscreen as a kiosk interactive for use by the Burke Museum of Natural History and Culture for their Burke Mobile education program. Because the interface is designed as a web application, it can also be used with a mouse.
Computer
This is the primary computer that will power the interactive, and the only requirement of the operating system is that it can host a local web server and browser. For the purpose of our objectives of keeping the project open-source, we will be using Debian linux. Therefore, the biggest remaining considerations are form factor and size; heat management; and overall processing power.
Traditional computers are costly and their designs are often proprietary, while their size makes them largely infeasible for a portable interactive kiosk. While traditional computers have substantial processing power, there is little to no passive heat management, which requires additional aftermarket cooling solutions.
This is where modern single-board computers offer a reprieve. They are often very small, sized similarly to a credit card, while having a full offering of technologies; such as USB, HDMI, and audio. These computers are based around ARMv6 processors, similar to those found in modern cell phones. This family of processors was built to allow passive heat management, decrease energy requirements and keep a small form factor.
The Raspberry Pi was specifically picked for several reasons. The Raspberry Pi Foundation, who create and maintain the Raspberry Pi computer, are a non-profit organization who offer free coding lessons to schools. Owing to their open-source nature, they have undergone rigorous testing through the Foundation itself as well as the open-source community and demanding consumer market. These systems are still extremely affordable, ranging from $5 to $55 based on features.
An important consideration was long-term feasibility and maintainability. The Raspberry Pi Foundation was one of the first single-board computers available on the consumer market and, while there are now more powerful alternatives, they have proven their stability throughout the technological boom surrounding the Internet of Things.
For the purpose of this project, the interactive is powered by a Raspberry Pi 3B+, which is considered the mid-tier model of the Raspberry Pi. It includes a 64-bit quad-core processor running at 1.4GHz, with built-in metal heatsink and 1GB of RAM and costs $35.
The Raspberry Pi 3B+ computer is a previous generation model and approximately a third as powerful as the newest generation. The Model 3B+ has been tested to be a viable solution for use with a touchscreen while having minimal interface lag and adequate heat management.
This model is still available and fully supported by the Raspberry Pi Foundation. Due to the many different technical applications and customers using the product, the Raspberry Pi Foundation has stated that the Model 3B and 3B+ will remain in production until at least January 2026.
Display
This is the display that will act as the primary touchscreen for the interactive. There are a lot of options that are available through a variety of resellers, for Raspberry Pi’s specifically or similar applications. Several options were explored, but the official Raspberry Pi touchscreen was selected in the end.
While the Raspberry Pi Foundation has made no official obsolescence statement guaranteeing production of this product, it has been available on the market and supported since 2015.
This touchscreen has guaranteed out-of-box support with the Raspberry Pi when used with the official Raspbian operating system. It receives the display signal directly through a DSI (Digital Serial Interface) cable connected to the Raspberry Pi computer. This port decreases the overall footprint by not requiring the use of a bulky HDMI cable. It is powered through a MicroUSB cable, with any additional current current powering the Raspberry Pi computer itself.
Additionally, this display is a glass with a ten-finger multitouch screen, while most other affordable displays are plastic with a one-finger resistive screen. Using glass on the screen lends to a pleasant usage experience and allows for easier cleaning. When used with adequate quality USB cables, both the Raspberry Pi and display can be powered through one power input.
Audio
One of the capabilities explored was the addition of on-board speakers, which would allow the addition of audio and video playback without the added requirement of headphones. While the interactive will be designed with access to the 3.5mm headphone jack, the addition of even minimal speakers could open up new possibilities.
Power requirements appear to be the biggest limiting factor when adding speakers. The Raspberry Pi has been built to work with sub-optimal power conditions, but it has limits. Attempting to power a touchscreen, speakers and the Raspberry Pi through one USB cable could result in a sluggish interface.
There are different ways audio could be integrated:
- Through a Raspberry Pi ‘HAT’ (Hardware Attached on Top).
- By connecting headphones directly to the Raspberry Pi;
- By connecting an externally powered set of speakers;
Raspberry PI HATs attach directly to the GPIO (General-Purpose Input/Output) pin port that is available on every model of Raspberry Pi. This HAT acts as an audio driver that powers an internal mono 2.8" x 1.2" 3W 4 Ohm speaker. This option draws the most power, but would result in the stereo audio of a higher quality.
Headphones can be used with the 3.5mm speaker port on the Raspberry Pi, but they still draw varying amounts of power from the system depending on the headphones. External speakers circumvent the Raspberry Pi power requirements by being powered independently. This offers a minimal, low-powered audio experience at the expense of headphone support. However, the Raspberry Pi, without an additional audio card, only outputs mono audio.
Near Field Communication
One of the desires with this interactive is to integrate NFC so that objects can be scanned and loaded on the screen. Ideally, this would be implemented using open-source libraries, such as libnfc. This could add a tactile level to the interactive, leading to increased retention about the experience.
Using an NFC reader that is connected through USB allows it to be placed away from the interactive screen, allowing different exhibit design capabilities. While this is a goal, there is still the reality of the limited power output of Raspberry Pi while using only one power source.
For this project, the Advanced Card Systems’ ACR122U reader was selected because it connects via USB and has a chipset that has support for libnfc, meaning it should operate out-of-the-box.
Storage
It is unlikely that more storage will be required for the interactive than is available in the MicroSD form factor, which acts as the primary storage device for the Raspberry Pi. Raspbian requires at least 8GB of storage and recommends a minimum speed of UHS-I/Class 10, though a speed of UHS-III would improve performance.
Additionally, a USB drive could be used to store the content, if the operating system was properly configured. This would allow the content to be swapped out by changing the attached USB drive.
Miscellaneous
There are several different MicroUSB cables that will be required. These include:
- A panel-mounted MicroUSB that will be attached to the 3D printed case, allowing it to be replaced, instead of risking damaging the Raspberry Pi through repeated usage.
- A MicroUSB cable to split the power from the power supply into two outputs; one for the display and one for the Raspberry Pi. If the GPIO port is available, the display can alternatively be powered through it.
- A panel-mounted 3.5mm cable will be attached to the 3D printed case, allowing it to be replaced, instead of risking damaging the Raspberry Pi through repeated usage.
Installation
If you are not following the quick-start guide and flashing an image of the operating system, these are the steps that are required to manually install and configure the operating system, as well as automatically boot the Raspberry Pi directly into Chromium kiosk mode.
Operating System
Raspbian
The Raspberry Pi Foundation provides instructional guides for installing Raspbian on their Raspberry Pi computers. These guides can be found here, alongside the operating system images. Alternatively, it is possible to purchase Raspberry Pi kits where the operating system is pre-installed.
DietPi
DietPi is a lightweight build of Raspbian that is designed to run on a variety of single-board computers. It has a small footprint, allowing it to improve performance on older Raspberry Pi models. It can either be installed through an image, similar to Raspbian, or it can be run as a script on Raspbian to convert it to DietPi. These guides can be found here.
Software
Most software used by this interactive can be installed through the repositories provided by the Raspbian or DietPi operating system.
Apache2
Until PHP is implemented, which allows for the generation of file lists by directly querying the system, currently there is a JavaScript function employed by this interactive to serve the same purpose. Using jQuery’s Ajax data loading feature, the Apache directory index is requested, and then the page is parsed to get the URL each file in the folder.
This requires that mod_autoindex is enabled. This should be enabled by default for the web application without additional configuration. However, it can be done manually by editing the configuration file located at /etc/apache2/apache2.conf to include the following.
<Directory /var/www/>
Options Indexes FollowSymLinks
AllowOverride All
Order allow,deny
Require all granted
</Directory>
Unclutter
This program is used to automatically hide the mouse cursor on the screen after a certain idle time, which is useful when you’re using a touchscreen but still want access to a mouse when necessary.
Matchbox Window Manager
This program is a minimal window manager that is required by Chromium to run properly.
Chromium Browser
This browser is the open-source browser produced by Google, and is used for the majority of their Chrome browser. It does not contain any Google branded content or features and is meant to be a more lightweight solution.
Scripting
The following script is used to load the Raspberry Pi into a Chromium web browser kiosk. It restricts access to the underlying operating system unless a keyboard is connected and a key combination is used.
Script
#!/bin/sh
xset -dpms
xset x noblank
systemctl start apache2
unclutter -idle 0 -root &
matchbox-window-manager &
chromium-browser --app=http://localhost/ --window-size=800x480 --start-fullscreen --disable-pinch --noerrdialogs --disable-translate --no-first-run --fast --fast-start --disable-infobars --disable-features=TranslateUI --no-sandbox --kiosk
Explanation
xset -dpms
Disables power features on the Raspberry Pi to disable it from going to sleep.
xset x noblank
Disable blanking of the display device
systemctl start apache2
Ensures that apache2 is started before Chromium.
unclutter -idle 0 -root &
This automatically hides the cursor while Chromium is open. -idle 0 tells it to hide the cursor instantly. Note: the ampersand at the end allows the script to run another program while keeping unclutter running in the background. Removing this will cause the system to not boot.
matchbox-window-manager &
This is a small windows manager that is used to help Chromium run. Note: the ampersand at the end allows the script to run another program while keeping unclutter running in the background. Removing this will cause the system to not boot.
chromium-browser --app=http://localhost/ --window-size=800x480 --start-fullscreen --disable-pinch --noerrdialogs —disable-translate —no-first-run —fast —fast-start —disable-infobars —disable-features=TranslateUI —no-sandbox —kiosk
This is a majority of the boot script. It loads Chromium into a kiosk mode that cannot be closed with a mouse or pointer device.
- --app=http:/localhost/ Run in web-app mode using the website located at localhost. Because we are running a local web server using apache2, this is directing the Pi to load the website it is hosting.
- --window-size=800x480 Configures the display dimension of the tablet screen. Without this, sometimes Chromium will load the website at incorrect dimensions.
- --start-fullscreen Starts up fullscreen
- --disable-pinch Disables the pinch to zoom feature for the main interface. It is still usable on images.
- --noerrdialogs Disables all error dialogs.
- --disable-translate Disables the language translation feature entirely.
- --no-first-run Disables the Chromium setup wizard.
- --fast --fast-start Opens the Chromium window even if the program isn’t entirely finished loading.
- --disable-infobars Disables all pop-up info bars.
- --disable-features=TranslateUI Disables the language translation UI. Note: this is a case-sensitive.
- --no-sandbox Disables processor sandboxing, which is required to run Chromium as root.
- --kiosk Specifies that Chromium is running as a kiosk, making it so that you cannot leave fullscreen using the mouse.
Web Application
To install the web application, its contents must be copied into the /var/www/ directory. The ‘content’ folder within the web application is where all custom content is stored.
Customization
Branding
A boot logo is displayed while the Raspberry Pi is loading. This is controlled through a systemctl process written in Python. This process is started early on in the boot process and uses the FBpyGIF library to inject an image directly into the frame buffer.
Customizing Content
Content Structure
Within the web application directory, there is a ‘content’ folder where all custom content is stored in a hierarchical folder structure for use by the interface. This content is stored within configuration files that can be edited without knowledge of HTML, CSS, or JavaScript.
An object page is constructed around the content that is provided, and it can include a brief text description, an image, an audio or video narration, callouts, and a full rich-text description that can contain additional images, videos or audio clips related specifically to this object. This rich text can also include links to other objects.
Within the ‘content’ folder, you can store multiple Programs that can be loaded on-the-fly as needed through the graphical user interface. This allows the interactive to work with any properly coded RFID tag, regardless of which program it is tied to.
- Nature’s Networks
- Shrub-Steppe
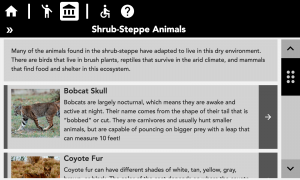
- Shrub-Steppe Animals
- Bobcat Skull
- Coyote Fur
- etc.
- Shrub, Steppe and Flowers
- Big Sagebrush
- Death Camas
- etc.
- Hanford Reach
- Shrub-Steppe Animals
- Coastal
- Human-Built Environment
- Shrub-Steppe
- Living Traditions
- Plants
- Trades and Gifts
Programs
You can create multiple Programs (such as Nature’s Networks or Living Traditions). The Program contains all information about its content in one folder that can be loaded directly onto the interactive. A program is meant to contain all the sections about one major overarching educational initiative.
The Program folder contains:
- @About.json: detailed information about the Program, such as its name, description, and cover image.
- @Media: directory to store multimedia.
- @Facilitation: directory to store facilitation information.
- @Sections: directory to store Sections, which are a sub classification of the Program (such as Shrub-Steppe or Human-Built Environments).
Sections
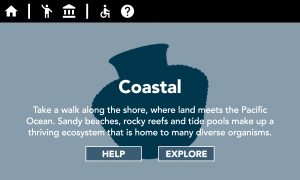
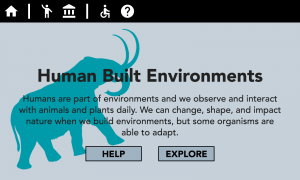
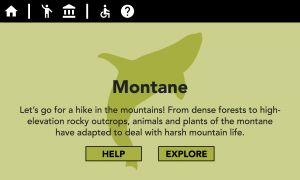
Contained within each Program, there can be numerous different Sections (such as Shrub-Steppe, Coastal, or Human-Built Environments). For example, the Shrub-Steppe section is about all content related to the Washington Shrub-Steppe.
For the purposes of a mini-museum, this allows there to be separate sections (or tables) designated for different objects and interpretation. Physical sections can be constructed around these digital exhibits, which act to allow a personalized experience per user within this space.
Each interactive can pull up information about every object in a section, so there can be multiple interactives per section to allow multiple users at once.
Exhibits
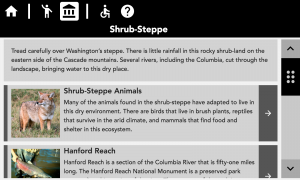
Each Section has Exhibits (such as Shrub-Steppe Animals, Plants or Hanford Reach). This allows the interactive to have separate but related exhibits that can all by tied to each other through content. For example, the Shrub-Steppe program contains an exhibit for Animals, Plants and Hanford Reach.
Objects
Finally, each Exhibit houses the individual objects that are tied to it. Each Object can contain its own content and media files.
Configuration
The Object screen will offer several design templates for different kinds of assets. There are three different image sizes that can be configured. Each Section can be assigned one of six themes. These themes use Burke Museum branding and colors to tie them further into the Burke. Themes are applied to the Object screen, or you can override the theme by object.
Web Application Features
Responsive design works on any display size, allowing this to be used on displays other than a Raspberry Pi touchscreen. It will also work if used with a mouse as a traditional desktop kiosk.
Minimalist design focuses on the content, allowing for a simple and responsive user interface. Built using the HTML5 boilerplate template.
All of the interface and underlying scripting is currently controlled by JavaScript, with plans to migrate parts of it over to PHP in the future. JavaScript was used because it manipulates content on the page in real-time, allowing for an interface that feels more responsive that a traditional kiosk which must load individual pages.
A majority of custom coding is done using the jQuery library, which is an open-source library for Javascript that was created to improve the readability and performance of more complex Javascript functions.
The web application is designed to work with a touchscreen using large on-screen buttons and elements, but it will also work with a mouse.
While in this rendition of the project we are using a tablet form factor, the simple nature of this product allows it to be used in many different use cases. It can be used as a tablet that is brought with a patron through the museum, scanning various RFID-tagged object that are accessible in your galleries. The tablet could also potentially set up as a static kiosk, with objects being brought to it to be scanned. Alternatively, the RFID and touchscreen can be excluded altogether and this software can be used on a traditional kiosk that is powered through the use of a mouse.
User Interface
Home
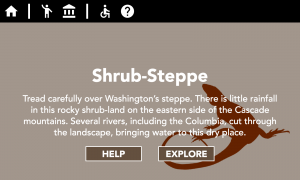
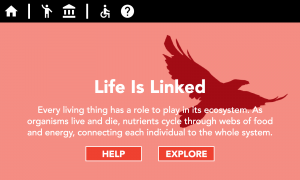
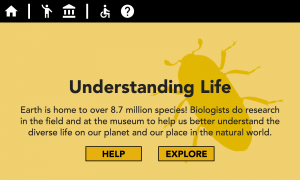
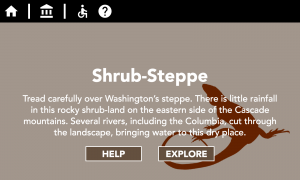
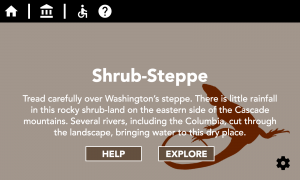
When the interactive is powered on, it will default to the home screen. It offers simple instructions on how to get started and displays the menu bar. This screen shows information that is defined for the Section of the Program that is selected. In this case, it is showing information about the Shrub-Steppe section, which is part of the Nature’s Networks program. After the interactive has been left idle, it will also return to the home screen.
The ‘Help’ will open the ‘Help’ tab, giving some basic instructions to the user so they can understand how to use the tablet. Clicking on ‘Explore’ will open the ‘Objects’ tab, allowing them to search and scroll through the various Exhibits and Objects.
Hidden on the home screen is a settings icon, but it is only visible for three seconds after tapping the screen.
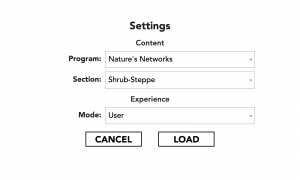
This icon opens a full-screen settings window that allows you to change the content and user mode that is automatically loaded. ‘Facilitator’ mode shows the ‘Facilitation’ and/or ‘Lessons’ tab, while ‘User’ mode hides these tabs. These settings persist through reboots.
Object
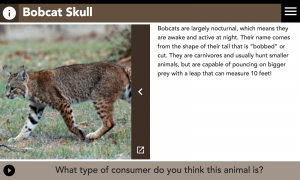
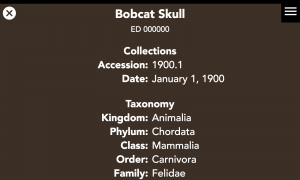
When navigated to through the interface, or an object is held to the NFC scanner, the Object screen is loaded. It has an image, a brief description, as well as ‘callouts’ that can be listed along the bottom. These ‘callouts’ cycle every few seconds to allow different questions to be posed.
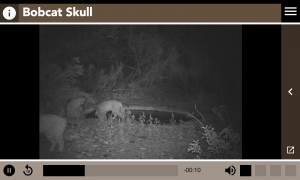
All Objects will have the ability to play an audio or video narration that starts automatically when an Object is loaded. The media can be controlled by the buttons along the bottom bar.
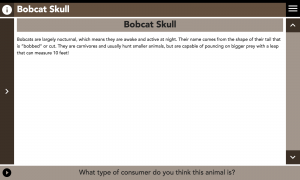
The Image can also be hidden to show in-depth rich text description. This description can include rich text, images, image sets, lists, quotes, as well as links to other objects, exhibits or sections.
Metadata fields can also be added. This metadata is completely customizable as needed for the object. You can create groups (such as collection information, taxonomy, diet, etc). Each group can have any number of key/value pairings.
Menu
When opened through the icon in the top right, or on the homescreen, the menu is visible. It shows different features of the tablet:
- Home: navigates the user back to the home screen.
- Facilitation: displays information that can be useful for a facilitator leading a program. Note: this is only visible when the interactive is in ‘facilitator’ mode.
- Lessons: displays lesson plans and activities for leading a classroom. Note: this is only visible when the interactive is in ‘facilitator’ mode.
- Exhibits: displays exhibits and objects within the currently selected Program and Section.
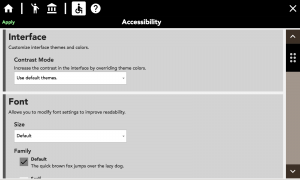
- Accessibility: offers customization options, such as text-size, high-contrast mode (black and white), audio playback, or other accessibility-minded options. These settings are reset after each reboot, or an idle time.
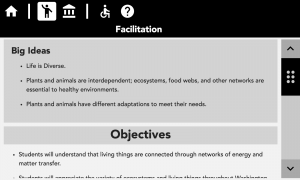
Facilitation
The facilitation tab is only visible when the tablet is in ‘facilitator’ mode, which can be enabled through a hidden settings button on the home screen.
This tab contains information that is useful for a facilitator to engage and lead the audience. There is different kinds of information that is stored here:
- Big Ideas
- These are the overarching department objectives as defined by the Museum.
- Objectives
- These are the goals and objectives as defined by the Burke Mobile program.
- Introductions
- These are an outline of steps that a facilitator can follow to aid with their introduction to the audience. This includes the overview of the program that is given to the audience, so that they have adequate background information.
- Instructions
- These are any extra rules or directions that are expressed to students, such as how to properly handle specimens and objects.
- Discussions
- A discussion is a topic that can be brought up by the facilitator, or used as a response to a question raised by the audience. They are meant to give an overview of topics that can be covered through the program. Each discussion has a name, a description, as well as facilitator responses that can be broken down by the depth of the response (basic vs advanced). These depths can be used to provide different information for elementary, middle school, or highschool students.
Accessibility
This menu tab allows for the customization of the interface to improve its accessibility for a variety of different use cases.
- Font Settings:
- Customize the size of the font,
- Customize the font face: included fonts are serif, sans serif, and OpenDyslexic font.
- Paragraph Settings:
- Customize paragraph alignment;
- Customize the line spacing;
- Contrast Mode
- ‘Light Mode’: makes the interface primarily white and light gray with black text.
- ‘Dark Mode’: makes the interface primarily black and dark gray with white text.
- Terminal Mode’: makes the interface primarily black and dark gray with green text.
Exhibits
The Exhibit tab defaults to a list of Exhibits within the Program and Section that are selected through the settings windows. It also shows a brief description of the Section (same as the one on the homescreen). Selecting an exhibit lists all of the objects within that exhibit.
